Set Up a Raspberry Pi Web Server (2021)
To set up a Raspberry Pi web server, you first need to install a web server. There are two popular web servers: Apache and Nginx. But in this tutorial, we will use Apache because it’s reliable and easier to use. Apart from that, we will also install PHP so that you can host dynamic webpages on your Raspberry Pi. Now having said all of that, let’s jump to the steps.
Install Apache Web Server on Raspberry Pi
First off, make sure you have flashed Raspberry Pi OS with desktop UI on the SD card. If you are new to all this, follow our guide on how to set up Raspberry Pi remotely. That said, if you have an external monitor, things will be much smoother.
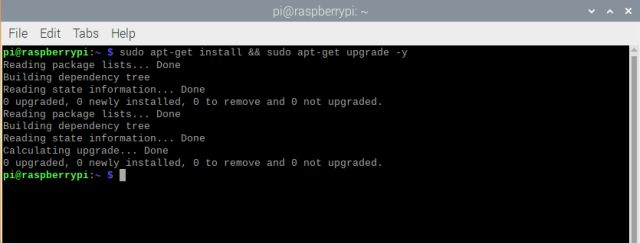
Once Raspbian OS boots up, open the Terminal and run the below command to update Raspbian OS to the latest version.
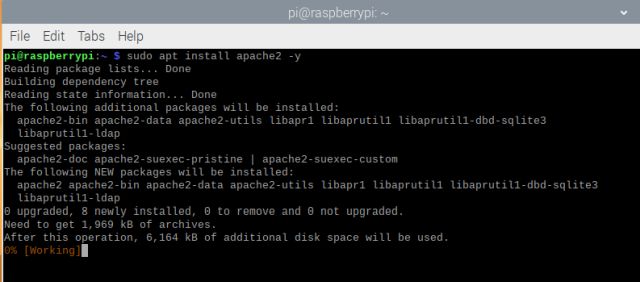
Next, we need to install the Apache web server on Raspberry Pi. Run the below command in the Terminal.
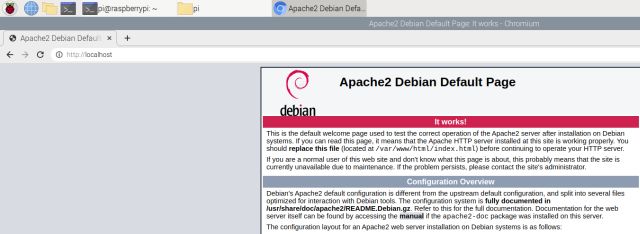
Once installed, the Apache web server will be live. Just open the browser on Raspberry Pi and enter localhost or 127.0.0.1, and hit enter to access the web server. It should load Apache’s HTML page.
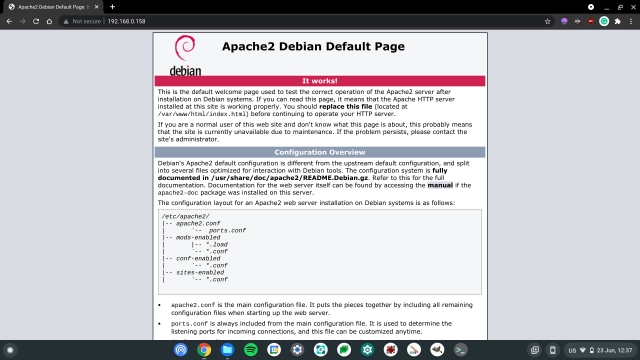
You can also directly enter the IP address of Raspberry Pi in a browser to access the web server. Run hostname -I in the Terminal, and you will find the IP address of your RPi.
Enter the IP address in the browser, and there you have it. In fact, you can use the IP address on any device on your local Wi-Fi network, and you will be able to access the web server. For example, I am able to access Raspberry Pi’s web server from my Chromebook with ease.
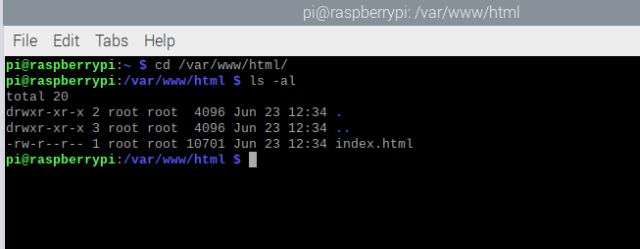
For your information, all web server files are saved in /var/www/html/ location. So you can change the directory to this location and view all the files. Here are the commands to run.
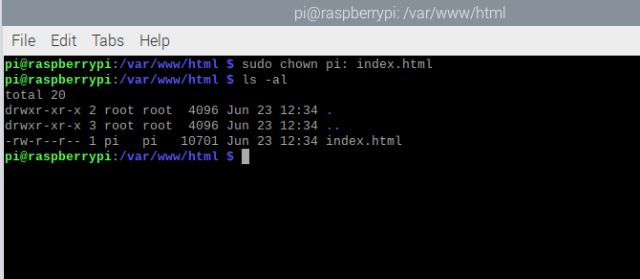
As you can see in the screenshot above, the index.html file is owned by root. So before modifying anything, you need to change the owner to pi (you). Run the below command to change the ownership. As you can see in the screenshot below, pi is now the owner of the web server. You can also use the same format to change the ownership of folders such as html and www.
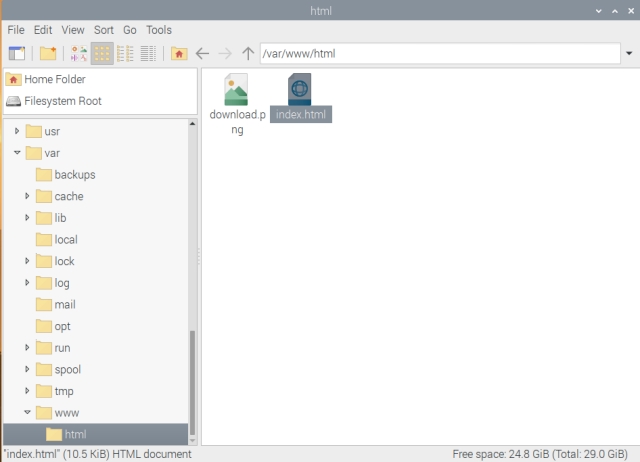
Now, go ahead and open the file through the Terminal or File Manager. I am using the File Manager for easier access. Navigate to “var -> www -> HTML”, right-click on the “index.html” file, and choose “Text Editor”.
Now, if I make any changes to the title and save it, then they will reflect on the web server right away. You will see the updated title when you open the web server in a browser window. This step confirms that your Raspberry Pi web server is working well.
Install PHP on Raspberry Pi
If you want to test your web pages on Raspberry Pi, installing just the webserver won’t cut it. You also need to install PHP to have a solution like XAMPP on Raspberry Pi. It will allow you to test dynamic web pages on your Raspberry Pi. Here is how to go about it.
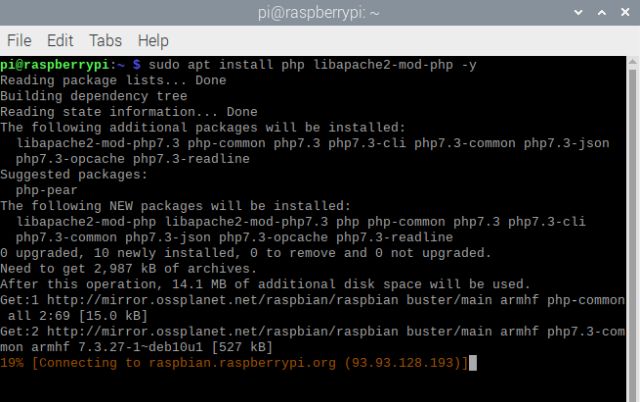
Run the below command to install the latest version of PHP on your Raspberry Pi.
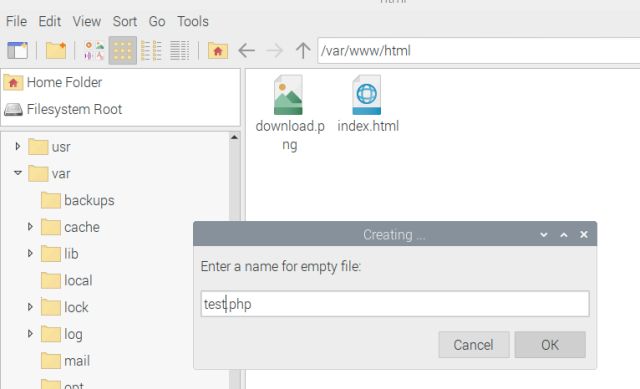
Next, move to the same var/www/html/ directory and create a PHP file using a text editor.
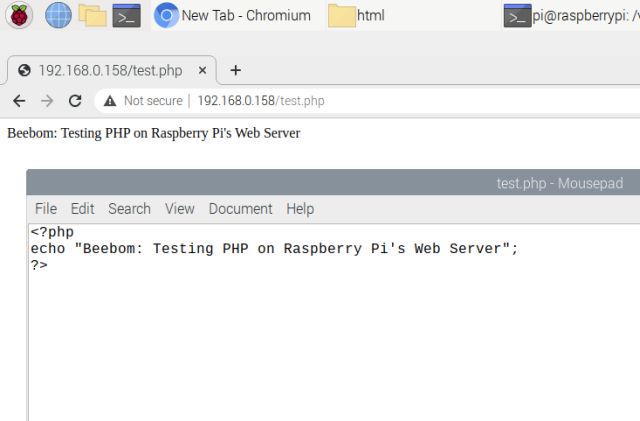
Next, open the file with a text editor and enter the PHP code you want to add. For example, I have added the PHP code that outputs a simple statement.
Testing FileZilla on Raspberry Pi
Once we have set up Apache web server and PHP on Raspberry Pi, it’s finally time to test if we can transfer our existing web assets to the RPi web server with the popular FTP client FileZilla. You can also use other FTP clients like WinSCP if you wish. Here are the steps to follow.
Install FileZilla (Free) on another PC connected to the same Wi-Fi network.
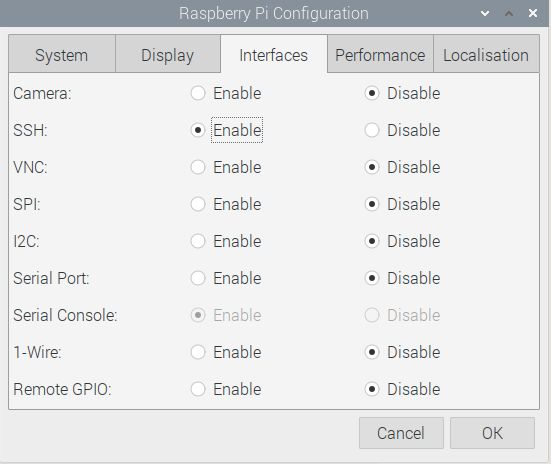
Next, on Raspberry Pi, navigate to the “Start Menu -> Preferences -> Raspberry Pi Configuration” section. Here, move to “Interfaces” and enable “SSH”.
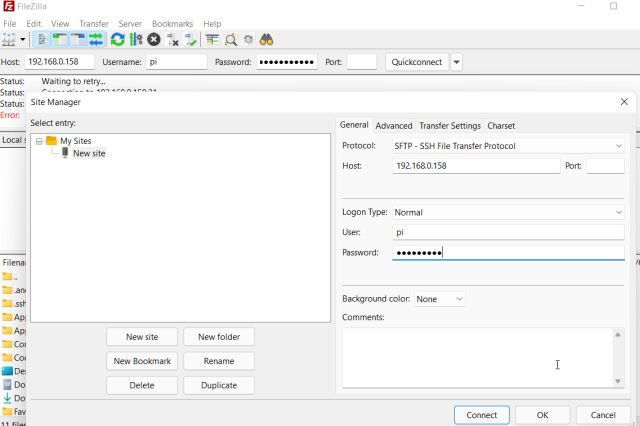
On FileZilla, open “File menu -> Site Manager” and add a “New Site”. Here, choose “SFTP” as the protocol and enter the IP address of Raspberry Pi’s web server in the “Host” field. Keep the “Port” field blank. After that, enter the default credentials: pi as the username and raspberry as the password. Now, click on “Connect”. Note: If you changed the password of Raspberry Pi during the setup, then enter the new password.
You will connect to your Raspberry Pi’s web server. Now, you can transfer all your HTML, CSS, and PHP assets directly to Raspberry Pi and get your web development underway without any hassle.
Turn Your Raspberry Pi into a Web Server in a Few Easy Steps
So that is how you can set up a web server on Raspberry Pi. All the tools required to get a web server running are available on the Debian-based Raspbian OS, so there is no problem at all. Even if you are a beginner, you can follow the step-by-step instructions above and turn the RPi board into a web server in no time. Anyway, that is all from us. If you have any questions, let us know in the comment section below.